

Rubbermaid 7×7 Shed Assembly: A Comprehensive Guide
Congratulations on your Rubbermaid 7×7 shed purchase! This guide details the 21-step assembly process, covering floor, walls, doors, and roof construction,
emphasizing a solid, level foundation for optimal performance.
Welcome! Before embarking on your Rubbermaid 7×7 shed assembly, careful preparation is crucial for a smooth and successful build. This isn’t just about following steps; it’s about ensuring a durable, long-lasting storage solution. Begin by thoroughly reviewing all included instructions and familiarizing yourself with the parts list – a complete inventory is essential to avoid mid-assembly frustrations.
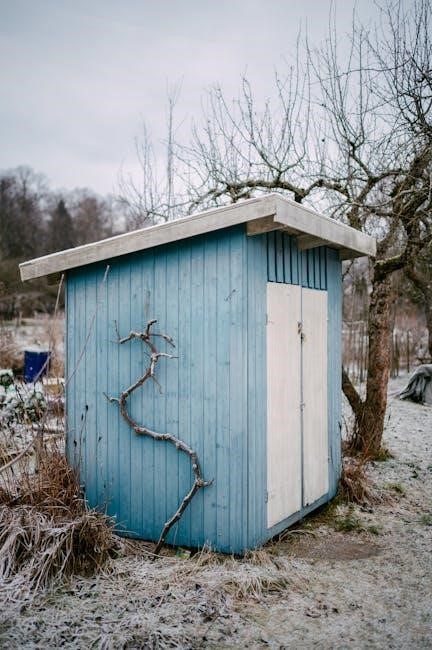
Crucially, the shed must be built on a solid, level surface. A pre-existing concrete or patio base is ideal, but gravel or a properly prepared wooden foundation will also suffice. Uneven ground will compromise the structural integrity and functionality of your shed. Take the time to level the chosen area meticulously before proceeding.

Safety first! Always wear appropriate safety gear, including gloves (especially when using the utility knife) and eye protection. Be mindful of potential pinch points during assembly. Remember the caution against overtightening screws – this can damage the panels. Download the official Rubbermaid manual from their website for detailed diagrams and specific guidance tailored to your 7×7 model. This will supplement these instructions and provide a visual aid throughout the process.
Tools Required for Assembly

Successful Rubbermaid 7×7 shed assembly hinges on having the right tools readily available. While the complexity isn’t extreme, specific implements will significantly streamline the process and ensure a secure, professional finish. A Phillips head screwdriver is absolutely essential – both manual and power versions are recommended, with the power driver offering speed and efficiency for numerous screws.

Beyond the screwdriver, a utility knife is vital for opening packaging and potentially trimming any excess material. A level is non-negotiable; maintaining a perfectly level foundation and ensuring walls are plumb are critical for proper door operation and overall structural stability. A measuring tape will be needed for accurate placement of components.
Additionally, consider having a rubber mallet for gently tapping panels into place, avoiding damage. Safety glasses and work gloves are strongly advised for personal protection. While not strictly required, a square can aid in ensuring corners are perfectly aligned. Finally, having a second person assist, particularly during wall and roof panel installation, can greatly simplify the process and prevent accidental damage. Prepare these tools before you start!
Parts List & Inventory
Before commencing assembly of your Rubbermaid 7×7 shed, a meticulous inventory of all components is paramount. This prevents frustrating mid-construction delays caused by missing parts. The kit includes various wall panels – left, right, front, and back – forming the shed’s enclosure. Roof panels, comprising left and right sections, plus gable pieces, constitute the roof structure.
Essential flooring components include floor frame pieces and floor panels, creating the base. The door itself, along with associated hardware (hinges, latches, handles), is a key element. Numerous screws (AA) are provided for securing panels, while roof pins (EE) connect roof panels to gables. Don’t forget the door header (DH) and other smaller fixings.
Carefully compare the physical parts against the parts list included in your manual. Note quantities and identify each component. Organize parts logically – grouping screws, panels, and hardware separately – will expedite assembly. Any discrepancies or missing items should be reported to Rubbermaid customer support immediately before proceeding. A complete inventory is the foundation of a smooth build!
Foundation Preparation: Ensuring a Level Base
A solid, level foundation is absolutely critical for the longevity and structural integrity of your Rubbermaid 7×7 shed. Failure to prepare adequately can lead to instability, door misalignment, and ultimately, premature deterioration. Ideally, construct the shed on a pre-existing cement slab or a well-compacted patio surface. These provide inherent stability and prevent ground contact.
If a prepared base isn’t available, you’ll need to create one. Begin by clearing the chosen area of all vegetation, rocks, and debris. Level the ground meticulously, using a spirit level and shovel to eliminate any high or low spots. Consider a gravel base for improved drainage and stability. Ensure the area is slightly larger than the shed’s footprint – at least 6 inches on all sides.
Regularly check for level throughout the process. An uneven base will translate directly into problems during wall and roof assembly. Remember, a properly prepared foundation isn’t just recommended; it’s essential for a durable and functional Rubbermaid shed. Prioritize this step for a rewarding building experience!
Floor Frame Assembly
Begin the floor frame assembly by identifying all components – typically consisting of side rails, front and rear rails, and corner posts. Lay out the side rails parallel to each other, ensuring they are oriented correctly according to the instructions. Next, position the front and rear rails between the side rails, forming a rectangular frame.
Utilize the provided hardware – screws are commonly used – to connect the rails at the corners. Ensure a secure and flush connection at each joint. Corner posts are then inserted and fastened, providing additional structural support and defining the corners of the floor frame. Double-check that the frame remains square during this process; diagonal measurements should be equal.
Pay close attention to pre-drilled holes and follow the manufacturer’s guidance regarding screw placement. Avoid over-tightening, which can strip the screw holes or damage the frame material. A correctly assembled floor frame is the foundation for a stable and long-lasting shed, so accuracy and attention to detail are paramount during this stage.
Floor Panel Installation
With the floor frame securely assembled, proceed to install the floor panels. These panels, typically constructed from durable plastic or composite materials, are designed to fit snugly within the frame. Begin by carefully positioning the first panel onto the frame, ensuring it aligns correctly with the edges and corners.
Secure the panel using the provided screws or fasteners, following the designated pattern outlined in the instructions. Work systematically, attaching each panel one by one, ensuring a tight and even fit. Pay attention to any interlocking features or alignment guides incorporated into the panel design. Consistent spacing of fasteners is crucial for uniform support.
As you install each panel, periodically check for levelness using a spirit level. Minor adjustments can be made during installation to compensate for slight imperfections in the ground. Once all panels are in place, inspect the entire floor surface for any gaps or unevenness. A properly installed floor provides a solid and weatherproof base for the rest of the shed structure.
Wall Panel Assembly ౼ Left Side
Begin assembling the left-side wall panels by laying them out on a flat, protected surface. Identify the specific panels designated for the left side, referencing the parts list to ensure accuracy. These panels typically include sections for the wall itself, as well as pre-drilled holes for door and window openings, if applicable.
Connect the panels using the provided connectors or screws, following the diagram in the assembly instructions. Ensure the panels are aligned correctly, creating a flush and seamless joint. Pay close attention to the orientation of the panels, as incorrect placement can affect the overall structural integrity of the shed.

Reinforce the connections by tightening the screws or fasteners securely, but avoid over-tightening, which could damage the panels. Once the left-side wall is fully assembled, carefully stand it upright and inspect it for any weaknesses or misalignments. This assembled wall section is now ready for attachment to the floor frame.
Wall Panel Assembly ― Right Side
Proceed with the right-side wall panel assembly, mirroring the process used for the left side. Lay out the designated right-side panels on a clean, flat surface, carefully identifying each piece using the parts list. These panels will correspond to the left-side panels, ensuring symmetry in the shed’s construction.
Join the panels together using the provided connectors and screws, strictly adhering to the assembly diagram. Precise alignment is crucial; ensure a flush connection between each panel to maintain the shed’s structural stability. Double-check the orientation of each panel before fastening, preventing potential errors later in the build.
Secure all connections by tightening the screws firmly, but cautiously avoid over-tightening to prevent damage to the panel material. Once fully assembled, carefully raise the right-side wall and inspect it for any imperfections or misalignments. This completed section is now prepared for attachment to the floor frame, alongside the left-side wall.
Wall Panel Assembly ― Front & Back
Now focus on assembling the front and back wall panels, which often incorporate openings for the door and potentially windows. Begin by laying out the components for either the front or back panel on a protected surface, referencing the parts list to confirm you have all necessary pieces.
Carefully connect the panels, paying close attention to the placement of any pre-drilled holes or designated slots for door and window frames. Utilize the provided connectors and screws, ensuring a secure and flush fit between each panel section. Accurate alignment is vital for proper door operation and overall structural integrity.
Fasten all connections, remembering the caution against over-tightening screws. Once assembled, inspect each panel for squareness and stability. The door header (DH) should be fastened to the bottom of the front gable (U) using screws (AA) in four places, ensuring a snug but not overly compressed gasket. Repeat this process for the back panel, preparing both for attachment to the floor and side walls.

Attaching Wall Panels to the Floor

With the floor frame and panels securely assembled, it’s time to connect the wall panels. Carefully lift the first wall panel – typically a side panel – and position it onto the floor frame, ensuring it aligns perfectly with the edges. Use the appropriate screws to fasten the wall panel to the floor frame, maintaining consistent spacing as indicated in the instructions.
Repeat this process for the remaining wall panels, working systematically around the perimeter of the floor. As you attach each panel, double-check for squareness and plumbness, making minor adjustments as needed to ensure a level and stable structure. Proper alignment at this stage is crucial for the overall integrity of the shed.
Remember to exercise caution and potentially enlist assistance when lifting and positioning the wall panels, as they can be quite heavy. Once all panels are attached, thoroughly inspect all connections, tightening screws as necessary, but avoiding over-tightening to prevent damage to the materials.
Door Frame Installation
Before proceeding, ensure the front wall panel is securely attached to the floor frame. The door frame installation involves carefully positioning the Door Header (DH) beneath the Front Gable (U). Fasten the header using Screw (AA) in four designated places, remembering a crucial caution: tighten screws only enough to compress the gasket – do not overtighten.
Next, align the side supports of the door frame with the front wall panel, ensuring they are plumb and square. Secure these supports using the specified screws, again being mindful not to over-tighten. The door frame must be perfectly aligned to allow for smooth door operation and a proper seal against the elements.
Double-check all connections, verifying the frame is stable and securely fastened. A wobbly or misaligned door frame will lead to operational issues later. Refer to the diagrams in the assembly instructions for precise screw placement and alignment guidance. Gloves are recommended when handling components and using tools.
Roof Panel Assembly ౼ Left Side
Begin the left side roof assembly by carefully positioning the left roof panel onto the assembled wall structure. Ensure the panel aligns correctly with the top edges of the side and front/back wall panels. This step requires precision to guarantee a secure and weatherproof fit.
Next, locate the pre-drilled holes along the edges of the roof panel and the corresponding locations on the wall panels. Using the appropriate screws (AA), begin attaching the roof panel to the walls. It’s vitally important to avoid overtightening the screws, as this can damage the panels or strip the screw holes. Caution is paramount throughout this process.
Continue securing the roof panel along its entire length, maintaining consistent spacing between screws. Regularly check for alignment and ensure the panel sits flush against the walls. Repeat Steps 29-35 for the Right Roof of the shed, mirroring the process on the opposite side. Proper assembly here is crucial for overall shed stability.
Roof Panel Assembly ౼ Right Side
Initiate the right side roof panel assembly by carefully maneuvering the panel into position atop the already constructed walls. Precise alignment with the side and front/back wall panels is essential for a watertight and structurally sound shed. Double-check the fit before proceeding to secure it.
Subsequently, identify the pre-drilled holes on both the roof panel’s edges and the corresponding wall panel locations. Employing screws (AA), commence attaching the roof panel to the walls. Remember the crucial caution: do not overtighten the screws, as this could compromise the integrity of the panels or the screw holes themselves. Gentle, firm tightening is key.
Proceed to fasten the roof panel along its entire perimeter, maintaining even spacing between each screw. Regularly verify alignment and ensure the panel sits flush against the wall surfaces. Mirroring the left side, repeat Steps 29-35 for the Right Roof, ensuring symmetry and stability. This step is vital for the shed’s long-term durability.

Gable Installation & Securing
Begin gable installation by carefully positioning the front and back gable pieces (U & M) onto the assembled structure. Ensure they align perfectly with the top edges of the side wall panels, forming the triangular shape of the roof. Proper alignment is critical for a secure and aesthetically pleasing finish.
Next, locate the pre-drilled holes on the gables and the corresponding locations on the side wall panels. Utilizing screws (AA), begin attaching the gables to the walls. Remember the repeated caution: avoid overtightening the screws to prevent damage to the panels or stripping the screw holes. A firm, controlled tightening is recommended.
Continue fastening the gables along their entire perimeter, maintaining consistent spacing between screws. Before fully securing, double-check the alignment and ensure the gables are flush against the wall surfaces. Fasten the Door Header (DH) to the bottom of the Front Gable (U) using Screw (AA) in four places, compressing the gasket gently – do not overtighten!
Roof Panel Attachment & Screwing (AA)
Carefully lift the roof panels into position, aligning them with the installed gables and side walls. Ensure the panels overlap correctly, creating a watertight seal. Begin attaching the roof panels using screws (AA), utilizing the pre-drilled holes as guides. Remember the consistent warning throughout the instructions: do not overtighten the screws, as this can compromise the integrity of the panels.
Start by securing the roof panels along the gable edges, then proceed to attach them to the side wall panels. Maintain consistent spacing between screws for even distribution of pressure and a secure hold. Repeat Steps 29-35 for the Right Roof of the shed, mirroring the process used for the left side.
As you screw the panels into place, periodically check for proper alignment and ensure the panels are flush against the supporting structures. Screws connect the Side Panels to the Roof Panels. A methodical approach will ensure a strong and weather-resistant roof assembly. Continue until all screws (AA) are installed in the designated 16 places on both the front and back gables.
Roof Pin Installation (EE) & Final Roof Securing
Following the secure attachment of the roof panels with screws (AA), proceed to install the roof pins (EE). These pins provide an additional layer of stability, firmly connecting the roof panels to the gables. Locate the designated four places on each side where the roof pins should be inserted, ensuring proper alignment before applying pressure.
Insert the roof pins (EE) carefully, driving them into place to create a tight and secure connection between the roof panels and the gables. This step is crucial for resisting wind uplift and maintaining the structural integrity of the shed roof. Again, exercise caution and avoid excessive force during installation.
Once all roof pins are in place, conduct a final inspection of the entire roof assembly. Verify that all screws are snug (but not overtightened) and that the roof panels are securely fastened to the gables and side walls. This final securing step completes the roof construction, providing a durable and weather-resistant shelter for your belongings.
Door Installation & Hardware Attachment
Begin the door installation by carefully positioning the door frame within the designated opening in the front wall panel. Ensure the frame is aligned correctly and sits flush against the surrounding structure. Fasten the Door Header (DH) to the bottom of the Front Gable (U) using Screw (AA) in four places, remembering to tighten screws only enough to compress the gasket – avoid overtightening to prevent damage.
With the frame secured, proceed to hang the doors. Gently lift each door into place, aligning the hinges with the corresponding mounting points on the door frame. Attach the hinges using the provided screws, ensuring a smooth and even swing. Once both doors are hung, close them to verify proper alignment and operation.

From inside the shed, install Screws (AA) in four places, connecting the doors to the frame for added security. Finally, attach any remaining hardware, such as door handles, latches, and locking mechanisms, following the manufacturer’s instructions. Always use gloves when handling the utility knife during this process.