
Manual bottle filling machines offer a cost-effective solution for low to medium volume production‚ especially for diverse liquids like pizza toppings or durable materials․
What is a Manual Bottle Filling Machine?
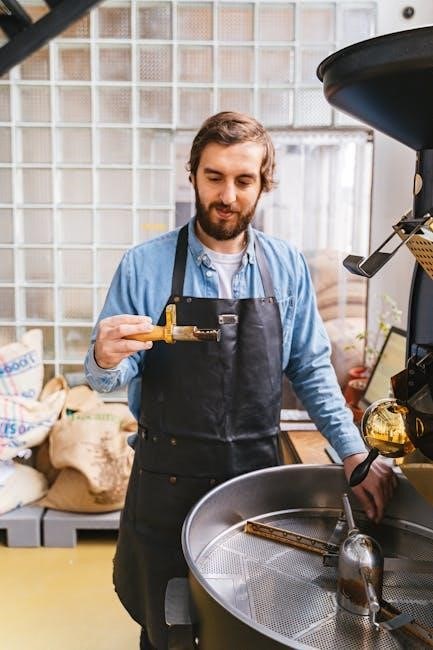
A manual bottle filling machine is a non-automated piece of equipment designed for dispensing liquids into containers by human operation․ Unlike automated systems‚ these machines rely on the operator to initiate and control the filling process‚ often utilizing a hand lever or similar mechanism․ They are commonly employed for smaller production runs or when handling a variety of liquids‚ such as diverse pizza sauces or specialized chemicals․
These machines typically feature a hopper or tank to hold the bulk liquid‚ filling nozzles to deliver the product‚ and a valve system to regulate flow․ They are valued for their simplicity‚ affordability‚ and adaptability‚ making them suitable for businesses with limited budgets or fluctuating product needs․
Applications Across Industries
Manual bottle filling machines find diverse applications across numerous industries․ The food and beverage sector utilizes them for sauces‚ oils‚ and smaller-batch beverages – think artisanal pizza toppings or specialty syrups․ Pharmaceutical and cosmetic companies employ them for creams‚ lotions‚ and liquid medications‚ demanding precision and hygiene․
Chemical industries use these machines for solvents‚ cleaning agents‚ and other liquid compounds․ Automotive businesses fill fluids like windshield washer fluid․ Even small-scale manufacturers benefit‚ filling products like essential oils or craft paints․ Their versatility makes them a valuable asset in various production environments․
Benefits of Using Manual Filling Machines
Manual bottle filling machines offer several key advantages․ Their initial investment cost is significantly lower compared to automated systems‚ making them ideal for startups or businesses with limited capital․ They boast operational simplicity‚ requiring minimal training for operators – perfect for smaller teams․
These machines provide flexibility‚ easily handling various bottle sizes and liquid types‚ even those like diverse pizza sauces․ They are also easy to clean and maintain‚ reducing downtime․ Furthermore‚ manual machines are portable and don’t require extensive electrical infrastructure‚ offering placement versatility․
Types of Manual Bottle Filling Machines
Manual bottle filling machines encompass gravity‚ piston‚ peristaltic‚ and syringe models‚ each suited for different viscosities and volumes – from pizza sauce to oils․
Gravity Filling Machines
Gravity filling machines are among the simplest and most economical manual options․ They rely on gravity to fill bottles‚ making them ideal for free-flowing liquids like water‚ certain sauces‚ or even diluted pizza toppings․ A key feature is their straightforward design – a hopper or tank holds the liquid‚ and bottles are placed under filling nozzles․
Operation involves opening a valve‚ allowing the liquid to flow into the container until the desired level is reached․ While simple‚ accuracy can be a challenge‚ often requiring skilled operators․ These machines are best suited for consistent liquid densities and minimal foaming‚ ensuring reliable and repeatable fill volumes․ They are easy to clean and maintain‚ contributing to their popularity in smaller operations․
Piston Filling Machines
Piston filling machines offer improved accuracy compared to gravity fillers‚ making them suitable for viscous products like sauces‚ creams‚ or even thicker pizza ingredients․ They utilize a piston that draws a precise volume of liquid into a cylinder and then dispenses it into the bottle․
Manual piston fillers typically involve a hand-operated lever or mechanism to control the piston’s movement․ This positive displacement method ensures consistent fill levels‚ even with varying liquid densities․ They are adaptable to a range of bottle sizes and are relatively easy to clean․ However‚ they may be slower than gravity fillers for high-volume applications․
Peristaltic Filling Machines
Peristaltic filling machines are ideal for sterile or sensitive liquids‚ as the product only contacts the tubing‚ avoiding contamination – crucial for food-grade applications like pizza sauce components․ These machines use rollers to compress a flexible tube‚ creating a pumping action that draws liquid and dispenses it into bottles․
Manual versions require hand-cranking or lever operation․ They excel at handling shear-sensitive fluids and offer precise volume control․ While slower than other methods‚ peristaltic fillers minimize product waste and are easily cleaned by replacing the tubing․ They are a good choice for smaller batches and specialized liquids․
Syringe Filling Machines
Syringe filling machines‚ in their manual form‚ utilize a syringe-and-needle system for extremely precise liquid dispensing – perfect for small volumes of high-value or potent substances‚ even pizza flavoring concentrates․ Operation involves manually drawing liquid into a syringe and then dispensing it into bottles via a nozzle․
These are best suited for very low-volume production runs or applications demanding exceptional accuracy․ While slow‚ they minimize waste and are easily cleaned․ They are commonly used in pharmaceutical‚ cosmetic‚ and laboratory settings‚ but can be adapted for specialized food applications requiring micro-dosing․

Components of a Manual Bottle Filling Machine
Essential components include a hopper/tank‚ filling nozzles‚ a valve system for flow control‚ and a bottle platform – crucial for consistent pizza sauce distribution․
Hopper/Tank
The hopper or tank serves as the primary reservoir for the liquid product before the filling process begins․ Its capacity dictates batch size and influences operational efficiency․ Constructed from materials like stainless steel or food-grade plastics‚ it ensures product integrity and prevents contamination – vital when handling diverse substances‚ even pizza ingredients․
Design considerations include ease of cleaning and accessibility for refilling․ Some models feature level indicators for monitoring remaining volume․ Agitation systems within the hopper can maintain homogeneity‚ particularly important for viscous liquids or those with settling tendencies․ Proper sealing prevents oxidation and maintains product quality throughout the filling operation․
Filling Nozzles
Filling nozzles are critical components‚ directly delivering the liquid into bottles․ Their design impacts fill accuracy‚ speed‚ and suitability for different product viscosities – from water-thin to thick pizza sauces․ Materials like stainless steel or chemically resistant polymers prevent corrosion and maintain hygiene․
Nozzle size and shape are selected based on bottle neck diameter and desired flow rate․ Anti-drip mechanisms minimize waste and ensure clean filling․ Some nozzles feature adjustable height to accommodate varying bottle sizes․ Regular cleaning is essential to prevent clogging and maintain consistent fill volumes‚ ensuring product quality and operational efficiency․
Valve System
The valve system regulates liquid flow‚ controlling the start‚ stop‚ and duration of filling․ Manual machines typically employ simple ball valves or pinch valves operated by a lever or handle․ Precise control is crucial for accurate fill levels‚ preventing overfilling or underfilling – vital for consistent product packaging‚ even with diverse liquids like pizza ingredients․
Valve materials must be compatible with the filled product to avoid corrosion or contamination․ Regular inspection and maintenance are essential to prevent leaks and ensure reliable operation․ Upgrading to more sophisticated valves can improve accuracy and reduce operator fatigue․
Bottle Platform/Conveyor
The bottle platform or conveyor supports and presents bottles for filling․ Simpler machines utilize a static platform where operators manually place and remove bottles․ More advanced manual fillers incorporate a short conveyor belt to increase throughput and reduce operator bending․ This is particularly helpful for heavier bottles or larger batch sizes‚ like those used for pizza sauces․
Platform/conveyor design must accommodate various bottle sizes and shapes․ Adjustable guides ensure proper bottle alignment under the filling nozzles․ Smooth‚ consistent movement is vital for accurate filling and preventing spills․ Regular cleaning is essential to maintain hygiene․
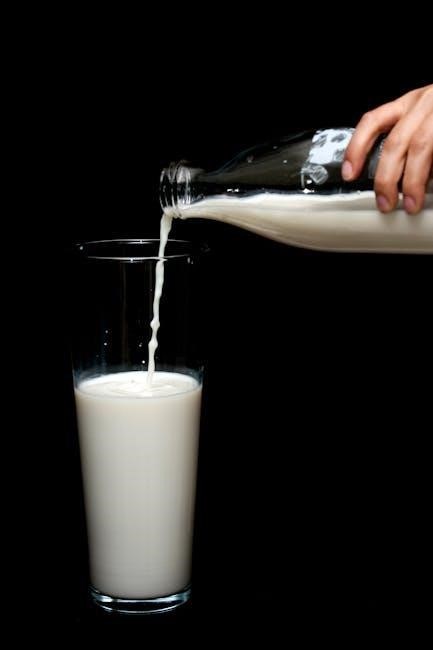
Operating Principles
Manual bottle filling relies on operator skill to control liquid flow‚ ensuring accurate volumes are dispensed into containers‚ similar to pizza ingredient portions․
The Filling Process – Step-by-Step
Initially‚ the operator positions an empty bottle onto the filling platform or conveyor․ Next‚ a valve is opened‚ allowing the liquid – be it a sauce like pizza topping or another substance – to flow from the hopper or tank․
The operator carefully monitors the fill level‚ often visually‚ and closes the valve when the desired volume is reached․ Some machines utilize a simple lever or handwheel for valve control․
Finally‚ the filled bottle is removed‚ and the process repeats․ Accuracy depends on operator consistency‚ making training crucial for reliable results‚ much like perfecting pizza preparation․
Adjusting Fill Levels
Adjusting fill levels on a manual bottle filling machine typically involves mechanical adjustments․ Many machines feature a stop mechanism or adjustable collar on the filling nozzle․ Raising or lowering this component directly alters the fill height within the bottle‚ similar to adjusting pizza slice sizes․
Operators can fine-tune these settings through trial and error‚ using graduated scales if available․ Precise adjustments require careful observation and potentially‚ volumetric testing to ensure accuracy․
Consistent liquid viscosity is vital; changes impact fill volume‚ demanding frequent recalibration for optimal performance․
Ensuring Accuracy and Consistency
Achieving accuracy and consistency with manual bottle filling demands diligent operator technique and machine calibration․ Regular checks using graduated cylinders or scales are crucial‚ mirroring the precision needed for consistent pizza portioning․
Maintaining a stable liquid temperature and viscosity is paramount‚ as fluctuations directly impact fill volumes․ Consistent bottle placement on the platform also minimizes variations․
Operator training focusing on consistent nozzle operation and fill level observation is essential․ Implementing a quality control checklist further reinforces reliable output․
Materials Compatibility
Manual filling machines must handle diverse liquids – from viscous toppings to corrosive substances – requiring food-grade materials like stainless steel for safety․
Handling Viscous Liquids
Manual bottle filling machines encounter challenges when dealing with viscous liquids‚ such as thick sauces or oils‚ often used in food production like pizza toppings․ Gravity fillers may struggle with these‚ requiring slower flow rates and potentially larger filling nozzles to prevent clogging․ Piston fillers excel here‚ positively displacing the liquid for consistent‚ accurate fills regardless of viscosity․
Adjusting the piston speed and nozzle diameter are crucial for optimal performance․ Some machines offer heated hoppers to reduce viscosity‚ improving flow․ Proper material selection – stainless steel is common – prevents reactions with the liquid and ensures easy cleaning‚ vital when handling diverse‚ sticky substances․
Compatibility with Corrosive Substances
Manual bottle filling machines used with corrosive liquids – cleaning agents‚ acids‚ or certain chemical compounds – demand careful material selection․ Standard materials can degrade rapidly‚ leading to contamination and machine failure․ Stainless steel alloys‚ particularly 316L‚ offer excellent resistance to many corrosive substances‚ ensuring product purity and longevity․
PTFE (Teflon) seals and hoses are also crucial‚ providing a barrier against chemical attack․ Regular inspection for corrosion is vital‚ alongside prompt replacement of affected parts․ Proper ventilation and operator safety protocols are paramount when handling hazardous materials․
Food-Grade Materials
Manual bottle filling machines handling food or beverage products necessitate strict adherence to food-grade material standards․ Components contacting the product – hoppers‚ nozzles‚ valves‚ and bottle platforms – must be constructed from materials like 304 or 316 stainless steel‚ ensuring no leaching of harmful substances․
FDA-compliant elastomers‚ such as food-grade silicone or EPDM‚ are essential for seals and gaskets․ Smooth‚ crevice-free designs minimize bacterial buildup‚ facilitating thorough cleaning and sanitation․ Regular validation and documentation of material certifications are crucial for maintaining food safety compliance․
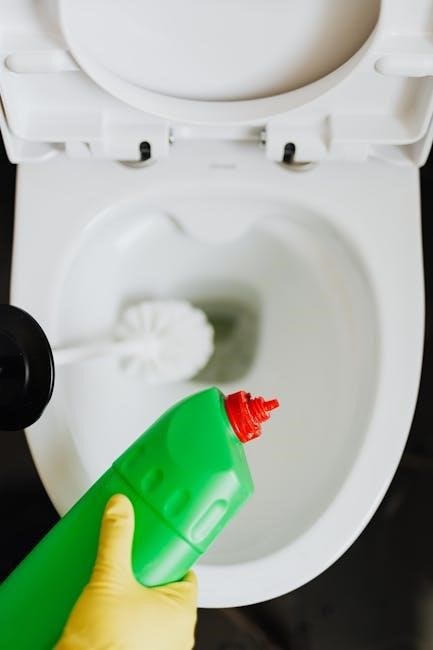
Safety Considerations
Manual bottle filling machines require operator training‚ emergency stops‚ and regular maintenance to prevent injuries․ Safe handling of liquids‚ like pizza sauce‚ is vital․
Operator Safety Guidelines
Prior to operation‚ all personnel must receive comprehensive training on the specific manual bottle filling machine being used․ This includes understanding the machine’s functions‚ potential hazards‚ and proper emergency procedures․ Operators should always wear appropriate personal protective equipment (PPE)‚ such as safety glasses and gloves‚ especially when handling corrosive or food-grade liquids like pizza ingredients․
Maintain a clean and organized workspace to prevent slips‚ trips‚ and falls․ Never attempt to operate the machine if it is damaged or malfunctioning․ Report any issues immediately to a supervisor․ Avoid reaching over moving parts and always keep hands clear of filling nozzles during operation․ Regular breaks are crucial to prevent fatigue and maintain focus․
Machine Maintenance Safety
Before any maintenance‚ completely disconnect the manual bottle filling machine from its power source to prevent accidental activation․ Lockout/Tagout procedures should be strictly followed․ Allow all components to cool down before handling‚ particularly after processing hot liquids like pizza sauce․ Wear appropriate PPE‚ including gloves and eye protection‚ during cleaning and repair․
Use only approved cleaning agents and tools․ Never attempt to repair complex components without proper training and authorization․ Regularly inspect hoses‚ nozzles‚ and valves for wear and tear‚ replacing them promptly․ Keep a detailed maintenance log to track repairs and preventative measures․
Emergency Stop Mechanisms
Manual bottle filling machines should be equipped with clearly labeled and easily accessible emergency stop (E-Stop) buttons․ These buttons must immediately halt all machine operations upon activation‚ preventing potential hazards during filling of various liquids‚ even pizza ingredients․ Regularly test E-Stop functionality to ensure responsiveness․
Operators must be thoroughly trained on the location and proper use of E-Stop mechanisms․ Implement a system where E-Stop activation requires a manual reset‚ preventing automatic restart․ Ensure the machine’s design allows for safe and rapid deceleration after an E-Stop event․
Maintenance and Cleaning
Regular maintenance and cleaning of a manual bottle filling machine are crucial for optimal performance and longevity‚ preventing contamination during pizza sauce filling․
Daily Cleaning Procedures
Consistent daily cleaning is paramount for maintaining hygiene and preventing product contamination in your manual bottle filling machine․ After each use‚ thoroughly disassemble all parts that come into contact with the liquid – including hoppers‚ nozzles‚ valves‚ and the bottle platform․ Wash these components with a food-grade detergent and warm water‚ ensuring all residue‚ even from sticky pizza toppings‚ is removed․
Pay close attention to crevices and hard-to-reach areas․ Rinse thoroughly with potable water and allow all parts to air dry completely before reassembly․ Wipe down the machine’s exterior surfaces with a damp cloth․ Document cleaning activities for quality control purposes․
Regular Maintenance Schedule
Establish a routine maintenance schedule to ensure the longevity and optimal performance of your manual bottle filling machine․ Weekly‚ inspect all components for wear and tear‚ focusing on valve seals and nozzle integrity․ Monthly‚ lubricate moving parts – following manufacturer guidelines – to prevent friction and ensure smooth operation‚ even when handling viscous liquids like pizza sauce․
Quarterly‚ conduct a more thorough inspection‚ checking for loose bolts and damaged wiring․ Annually‚ consider a professional inspection to identify and address potential issues before they escalate‚ minimizing downtime and maximizing efficiency․
Troubleshooting Common Issues
Addressing common problems promptly minimizes downtime․ Inconsistent fill levels often stem from clogged nozzles or faulty valve systems; cleaning or replacing these components is crucial․ Leaks typically indicate worn seals – replace them immediately․ If the machine struggles with viscous liquids‚ ensure proper nozzle selection and consider adjusting filling speed․
For complete stoppages‚ check power connections and safety mechanisms․ Regularly inspecting and maintaining the machine‚ similar to ensuring quality pizza ingredients‚ prevents major breakdowns and maintains consistent output․
Cost Analysis
Manual filling machines present lower initial costs compared to automated systems‚ but long-term expenses include maintenance and labor‚ impacting overall return on investment․
Initial Investment Costs
The upfront expenses for a manual bottle filling machine vary significantly based on the type‚ capacity‚ and materials of construction․ Simpler gravity fillers represent the lowest cost entry point‚ often ranging from a few hundred to a couple of thousand dollars․ More sophisticated piston or peristaltic models‚ offering greater precision and versatility‚ can easily exceed $5‚000․
Additional costs to consider include shipping‚ installation (though often minimal for manual machines)‚ and any necessary tooling or change parts for different bottle sizes or liquid types․ Budgeting for these ancillary expenses is crucial for accurate financial planning․ Remember to factor in potential costs for operator training as well․
Long-Term Operating Costs
While manual bottle filling machines have lower initial costs‚ ongoing expenses must be considered․ Labor is a significant factor‚ as these machines require dedicated operators․ Cleaning supplies‚ including sanitizers and lubricants‚ contribute to recurring costs․
Maintenance‚ though generally simpler than automated systems‚ still necessitates periodic part replacements like valves or seals․ Energy consumption is minimal‚ but should be accounted for․ Downtime due to operator fatigue or minor adjustments can impact production efficiency․ Regularly assessing these factors ensures accurate cost projections and profitability․
Return on Investment (ROI)
Calculating the ROI for a manual bottle filling machine depends heavily on production volume and labor costs․ Lower upfront investment translates to quicker initial returns‚ particularly for small businesses or startups․ Reduced energy consumption further enhances profitability․
However‚ slower filling speeds compared to automated systems may limit overall output․ ROI is maximized when the machine consistently meets production demands without requiring significant operator overtime․ Careful consideration of these factors‚ alongside maintenance and supply expenses‚ provides a realistic assessment of long-term financial benefits․
Choosing the Right Machine
Selecting a manual bottle filling machine requires evaluating bottle size‚ liquid viscosity (like pizza sauce!)‚ and desired volume to ensure optimal performance and efficiency․
Factors to Consider (Bottle Size‚ Liquid Type‚ Volume)
When selecting a manual bottle filling machine‚ several key factors demand careful consideration․ Bottle size is paramount; machines must accommodate the range of containers you utilize‚ from small sample vials to larger‚ family-sized bottles – perhaps even those holding pizza sauce! Liquid type dictates the necessary machine components․ Viscous liquids‚ like honey or thick oils‚ require different mechanisms than water-thin solutions․
Furthermore‚ the desired fill volume significantly impacts machine choice․ Accurate and consistent filling is crucial‚ whether dispensing precise amounts for pharmaceutical applications or standardized portions for food products․ Understanding these factors ensures you invest in a machine perfectly suited to your specific production needs‚ maximizing efficiency and minimizing waste․
Supplier Selection Criteria
Choosing the right supplier for a manual bottle filling machine is as crucial as selecting the machine itself․ Prioritize suppliers with a proven track record of reliability and positive customer reviews – look beyond just the initial price․ Assess their technical support capabilities; prompt assistance is vital for troubleshooting and maintenance‚ especially when dealing with diverse liquids like pizza ingredients․
Evaluate their customization options․ Can they adapt a machine to your specific bottle sizes or liquid types? Consider warranty terms and the availability of spare parts․ A reputable supplier will offer comprehensive support‚ ensuring long-term operational efficiency and minimizing downtime․
Customization Options
Manual bottle filling machines aren’t always “one-size-fits-all․” Customization is key for optimal performance․ Suppliers often offer adjustments to filling nozzle configurations to accommodate various bottle shapes and sizes‚ crucial when handling diverse products like pizza sauces or specialty oils․
Volume adjustments are also common‚ allowing precise control over fill levels․ Some manufacturers can modify the material of construction for compatibility with corrosive substances․ Consider options for adding features like drip trays or bottle counters․ A tailored machine maximizes efficiency and minimizes product waste‚ improving your overall production process․
Future Trends in Manual Filling Technology
Manual filling machines are evolving with simple automation integration‚ improved ergonomics for operators‚ and exploring enhanced‚ food-grade material options for diverse liquids․
Integration with Simple Automation
The future of manual bottle filling machines isn’t about complete robotic takeover‚ but strategic automation enhancements․ We’re seeing trends towards integrating foot pedals for dispensing‚ freeing operator hands for bottle placement․ Automated bottle indexing systems‚ moving bottles along a short conveyor‚ reduce repetitive motion and increase throughput․
Simple timers controlling fill durations offer greater consistency․ Digital counters displaying filled bottle numbers improve tracking․ These additions maintain the affordability and flexibility of manual machines while boosting efficiency and reducing operator fatigue – a crucial step for long production runs‚ even with diverse liquids․
Improved Ergonomics
Modern manual bottle filling machines are increasingly focused on operator comfort and safety․ Designs now prioritize adjustable height features‚ minimizing bending and stretching during prolonged use․ Improved handle designs reduce hand strain‚ crucial for repetitive filling actions‚ whether handling pizza sauce or corrosive substances․
Reduced machine weight and strategically placed controls enhance maneuverability․ Clear sightlines to filling nozzles and bottle platforms improve accuracy and reduce errors․ These ergonomic improvements not only boost operator well-being but also contribute to increased productivity and reduced risk of workplace injuries․
Enhanced Material Options
Contemporary manual bottle filling machines are constructed with a wider range of materials to suit diverse applications․ Stainless steel remains dominant for food-grade and corrosive liquid handling‚ like pizza ingredients or cleaning solutions‚ ensuring hygiene and durability․
However‚ advancements include the use of specialized polymers and coatings offering improved chemical resistance and reduced material weight․ These materials minimize contamination risks and simplify cleaning procedures․ Manufacturers are also exploring more sustainable material choices‚ aligning with growing environmental concerns and offering cost-effective solutions․